Customize Candidate Rejection Reasons in greytHR Recruit
Updated in November - 2025 | Subscribe to watch greytHR how-to video
Within the hiring journey, there are stages where you may decide not to move a candidate forward and reject them with a specific rejection reason. If the appropriate reason is not listed, the recruiter may select the wrong reason, leading to unclear or inaccurate feedback.
greytHR Recruit allows recruiters to add or customize the candidate rejection reasons, helping you provide clear and consistent feedback or reasons that align with your company’s hiring criteria. This ensures avoiding vague or incorrect responses and improving the overall transparency and professionalism of the hiring process.
Add candidate rejection reasons in greytHR Recruit
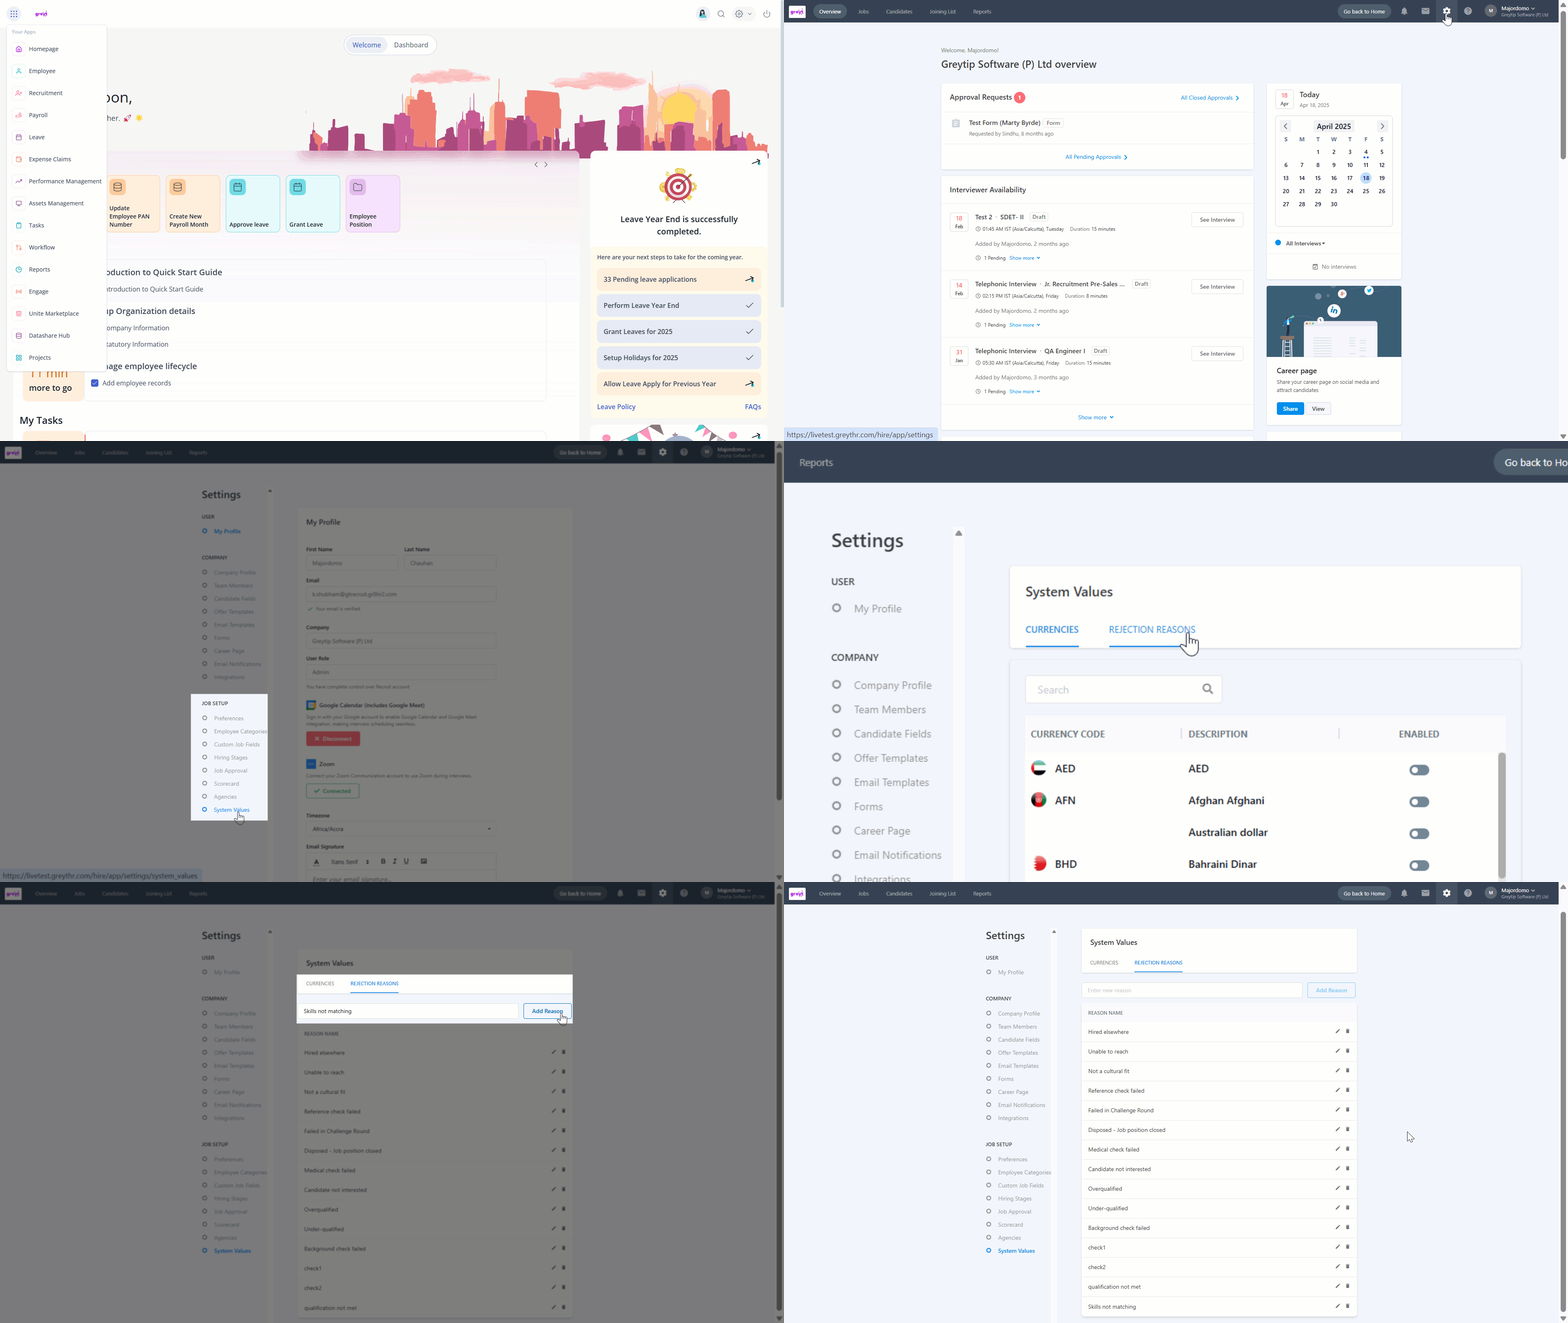
You can add the rejection reasons from your greytHR Admin portal. Hover on the 9 dots, and click Recruitment > Settings > System Values.
Under the Reject Reasons tab, enter the rejection reason in the Enter new reason box, and click the Add Reason option.
The newly added rejection reason will appear at the bottom of the list.
Note: Each rejection reason must be unique.
Customize candidate rejection reasons in greytHR Recruit
greytHR Recruit provides you with the options to customize the rejection reasons for candidates.
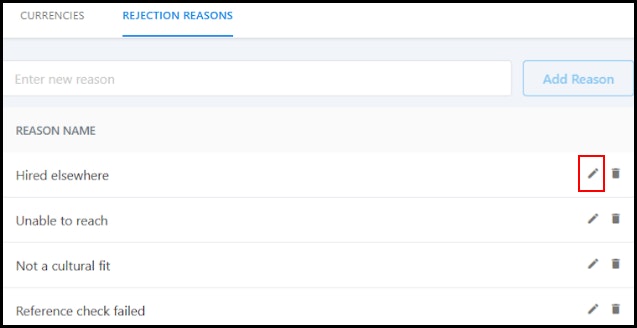
You can edit a rejection reason by clicking the Edit icon.


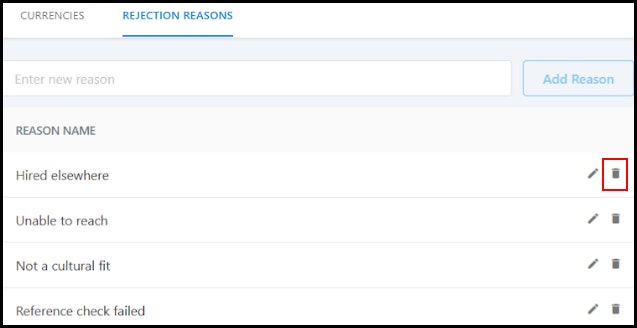
Similarly, you can delete a rejection reason by clicking the Delete icon.
View rejection reasons in greytHR Recruit
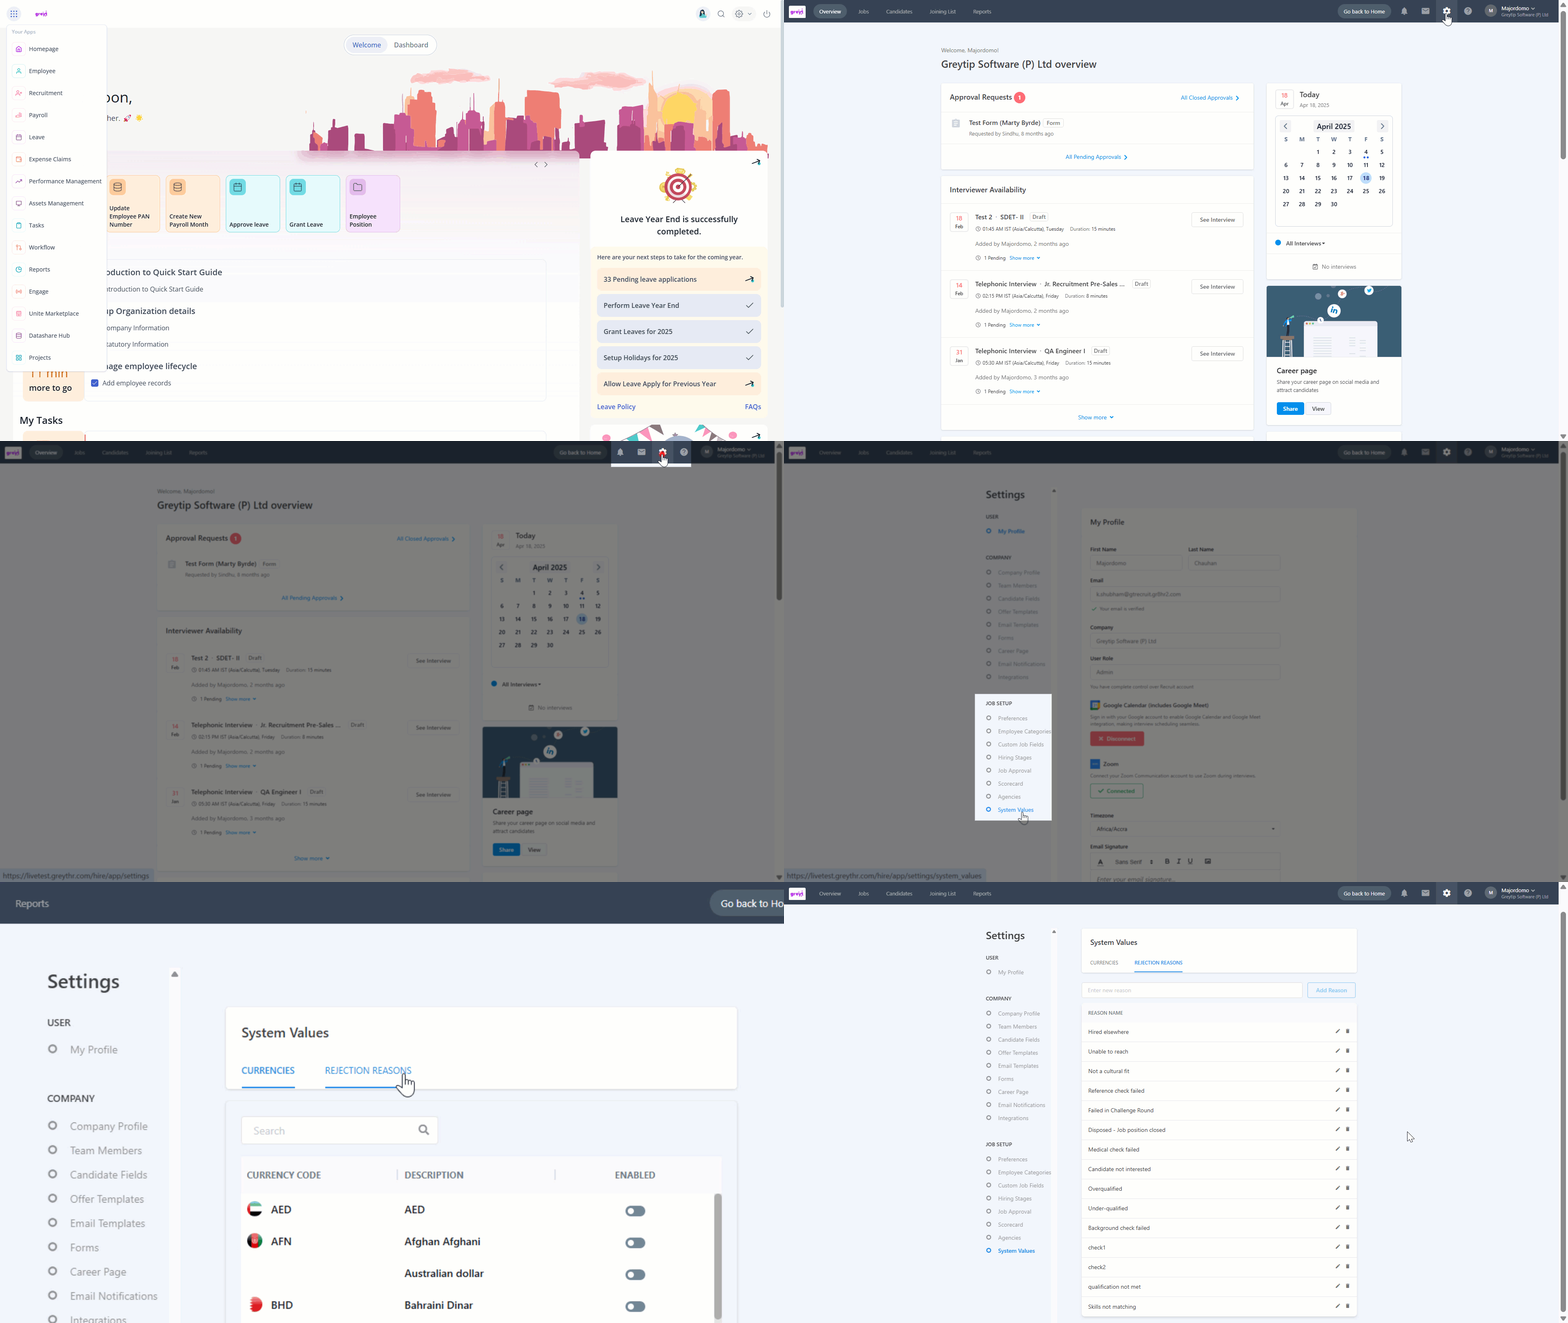
You can view rejection reasons that best suit your organisation's requirements from your greytHR Admin portal, hover on the 9 dots, and click Recruitment > Settings > System Values.
Under the Reject Reasons tab, you will be able to see all the rejection reasons listed.
Use rejection reasons while rejecting a candidate with greytHR Recruit
Providing a clear rejection reason helps to maintain transparency, improve hiring decisions, and ensure consistent documentation. For a candidate, it offers valuable feedback, builds trust, and leaves a positive impression of the company.
To select the appropriate rejection reason while marking a candidate as Rejected, go to the Jobs page, click on the required job card, and select the candidate.
Under the Candidate Status dropdown, select the status as Rejected and choose the appropriate rejection reason. Once done, you can either opt to notify the candidate or reject without notifying them.
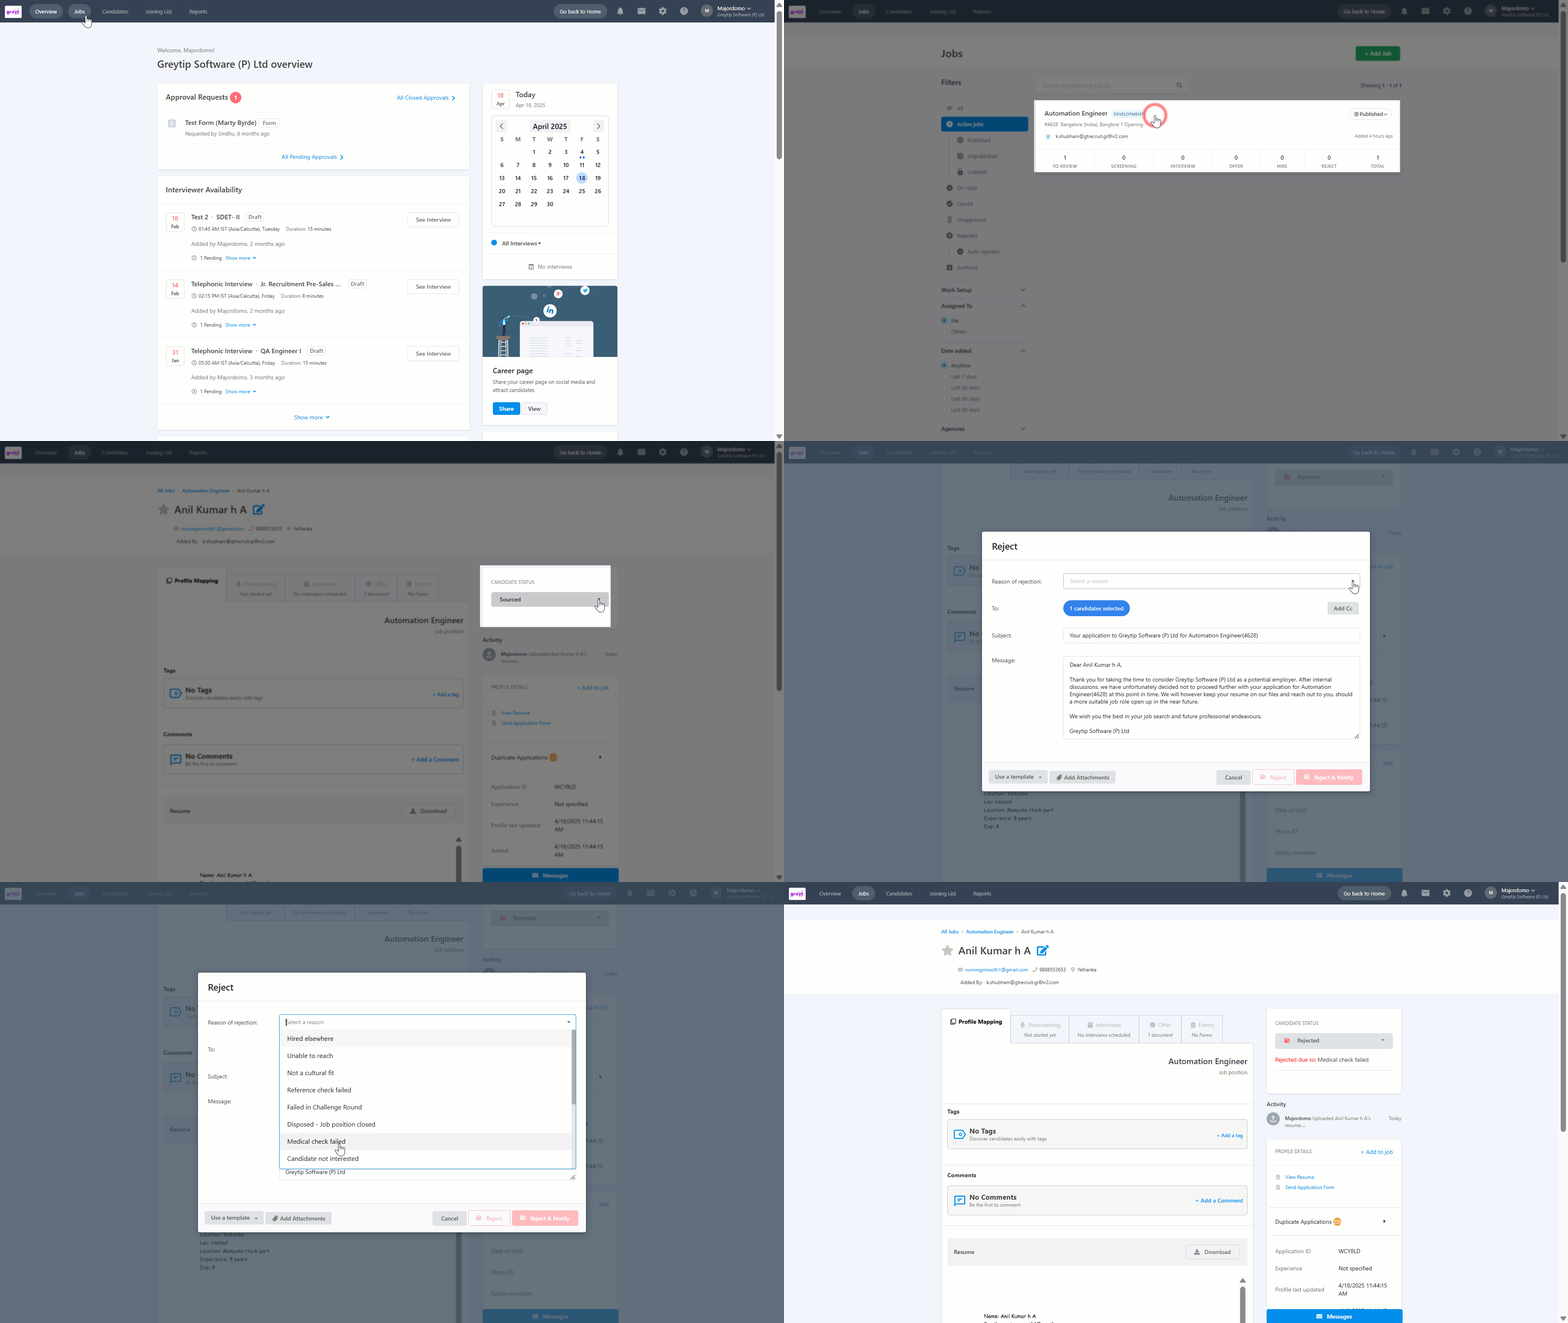
Alternatively, you can reject the candidate from the Candidates tab. Select a candidate, click Jobs, choose the required job card, and reject the candidate.
After the candidate is rejected, you can view the reason for rejection under Candidate Status.

Other related links: