Efficiently Manage Expense Batches with greytHR
Updated in May - 2026 | Subscribe to watch greytHR how-to video
In many companies, reimbursing employee expenses is a recurring task. Employees often submit multiple expense requests such as travel, meals, or office-related costs over the course of a month.
Manually reviewing and paying each individual expense claim can be error-prone and time-consuming. Instead of processing each request separately, companies typically prefer to review and pay approved requests in groups, either weekly, fortnightly, or monthly.
The expense batch configuration in greytHR, allows you, as an admin, to group multiple approved expense requests together and mark them as paid in one go. You can create these batches either as a one-time process or set them up to be generated automatically at recurring intervals.
To configure access rights for the feature, from the greytHR Admin portal, click the Settings icon > User Administration > User > User Roles.
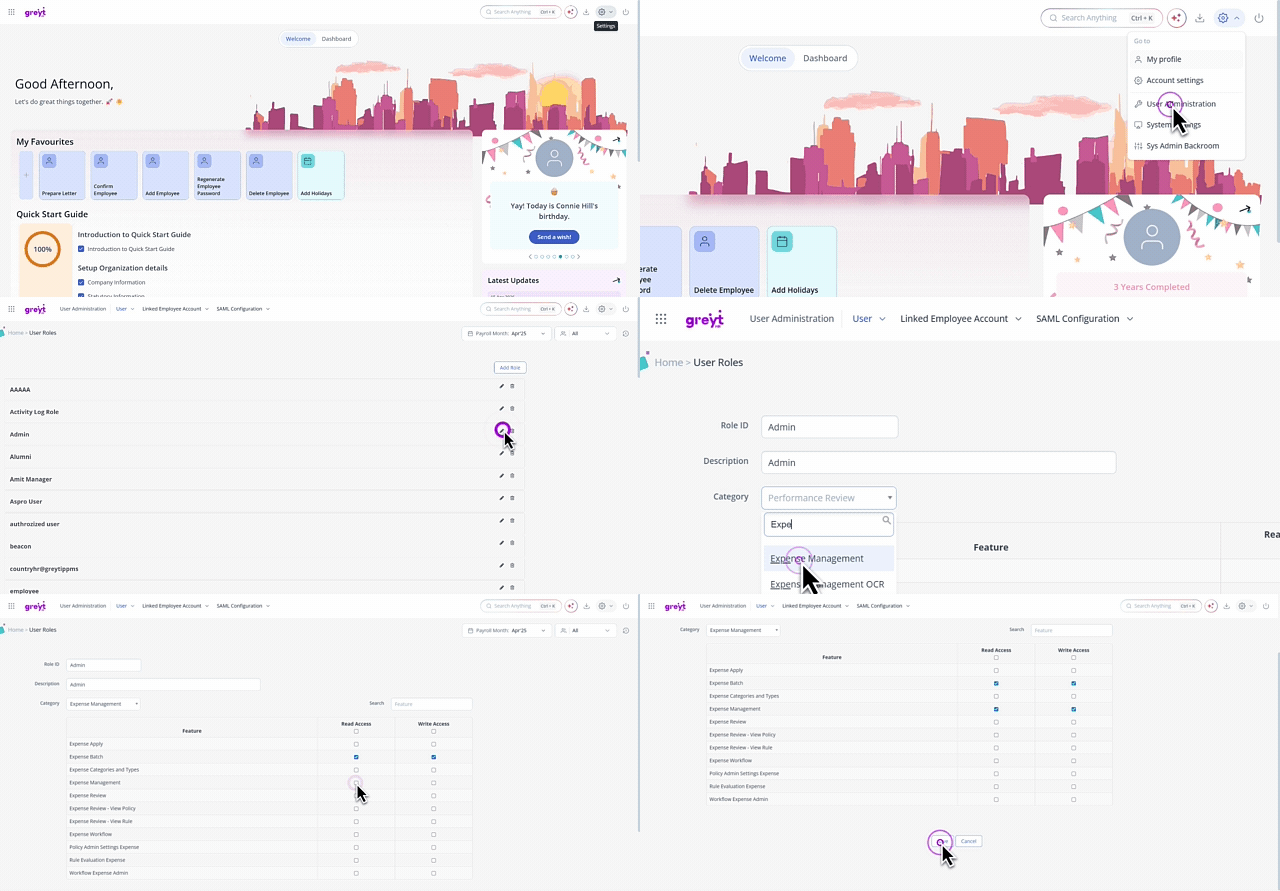
Select the admin user role card and click the Edit icon.
From the Category dropdown list, select Expense Management. The table displays all the related features.
Enable the Read Access and Write Access checkboxes for features such as Expense Batch and Expense Management.
Click Save.
Create a one-time expense batch
To create a one-time expense batch, hover over the 9 dots and go to Expense > Admin Tools > Settings > Batch Configuration.
Click Create a Batch.
In the slider that appears, enter the Batch Name. Select Batch Schedule as One-time and select the Duration (date range). All expense requests approved within this date range will be grouped under this batch.
Click Create to generate the batch.


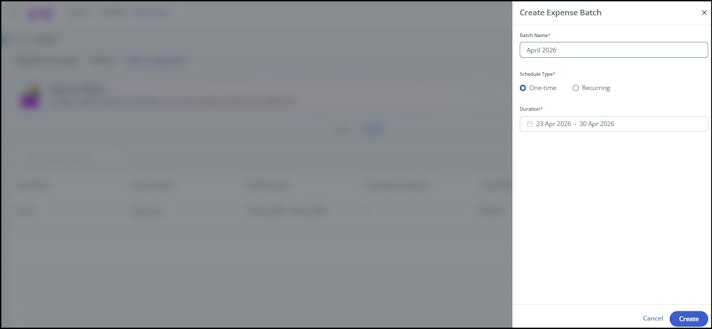
Once created, the batch will appear in the listing page, showing key details like Batch Name, Batch Schedule, Batch Duration, Total expense Requests, Payout Amount, Status and Action.
Create a recurring expense batch
If you prefer automation, you can configure the system to create batches at regular intervals. Automating batch creation helps ensure consistency and reduces manual effort.
To create a recurring expense batch, hover over the 9 dots and go to Expense > Admin Tools > Batch Configuration.
Click Create a Batch
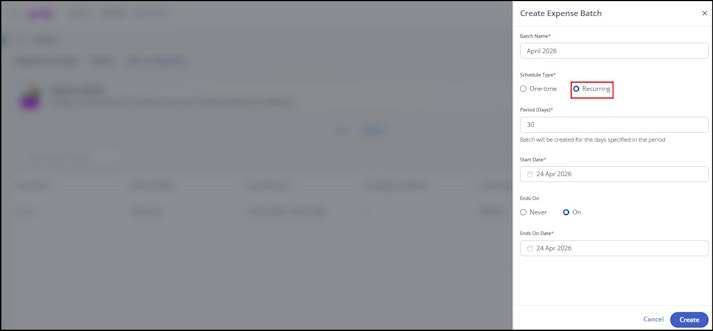
In the slider that appears, Enter the Batch Name, select Schedule Type as Recurring, enter the Period (Days) (for example, 15 days). Select the Start Date. Under Ends On, choose:
Never (to continue indefinitely), or
On and select an End Date
Click Create to generate the batch.

Note:
Recurring batches are automatically created based on the defined schedule.
Once created, these batches will appear in the Active tab on the Batch Configuration page.
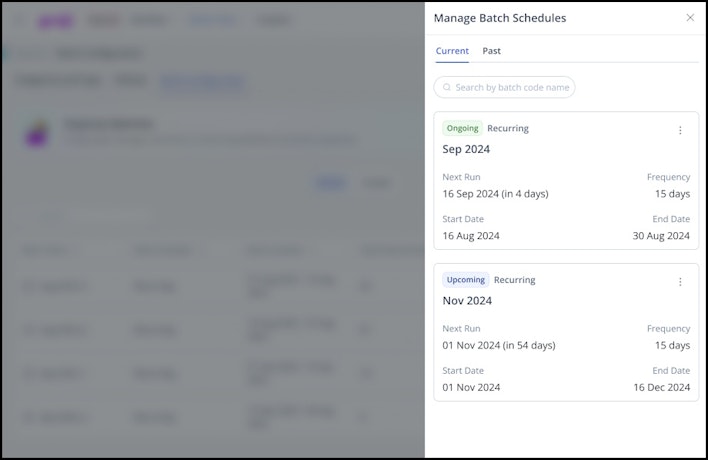
You can track and manage these schedules using the Manage Batch Schedules option.


Once a batch is created, you can:
View all approved expense requests included in the batch
Mark requests as Paid (individually or in bulk)
Track the payment status of each batch (Paid, Unpaid, Partially Paid)
Lock the batch to prevent any further changes or new approvals from being added
Batches are displayed under the Active and Closed tabs based on their payment status:
Active – Unpaid or partially paid batches
Closed – Fully paid batches
View and edit batches
All created batches (One-time/Recurring ) are displayed under Active and Closed tabs. For each batch, you can see: Batch Name, Batch Schedule, Batch Duration, Total expense Requests, Payout Amount, Status and Action.
You can click View Details to open the batch summary.
Note:
Once a batch is created, it cannot be edited except for marking payments.
For recurring batches: The date range cannot be edited; only the batch name can be edited.
For one time batches: Both the batch name and date range can be edited.
For locked batches (one time or recurring): Editing or deleting is not allowed.
Set up exchange rates for an expense batch
Once employees submit expense claims in different currencies and managers approve them, admins can view those requests on the Batch Configuration page under the Payment Pending tab.
If an employee submits an expense in a currency other than the base currency and the exchange rate for that date is not configured, you must first set up the applicable exchange rate before processing the payment.
To set up the exchange rate, go to the Batch Configuration page and open the Payment Pending tab. Here, you can identify the expense requests for which the exchange rate has not yet been configured.
Click on the → under the Actions tab to view the expense requests for which the exchange rates are not configured.
Alternatively, you can click on the View Records option.
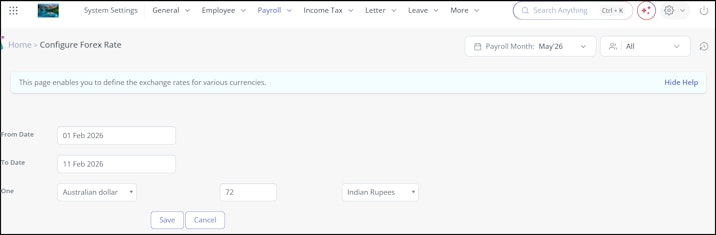
The list of expenses appear where the exchange rates are not configured. Click Configure Exchange Rates.
Click +Add and enter the From and To dates.
From the One drop-down, select the base currency, enter the exchange rate and then again select the Forex Currency.
Click Save.


Info:
The Payout Amount displayed includes only those amounts for which the exchange rates have been configured.
Once the payout is initiated, the expense request would move to the Payment Intiiated tab and the exchange rate configured can’t be edited.
Expense requests can be moved from Payment Initiated or Payment Completed back to the Payment Pending status, if required.
Generate a bank transfer file
Once expense requests are approved and exchange rates are configured, admins can process payments from the Payment Pending tab.
Note: greytHR supports bank transfer file generation directly from the expense batch, using the bank transfer templates configured in the Payroll module.
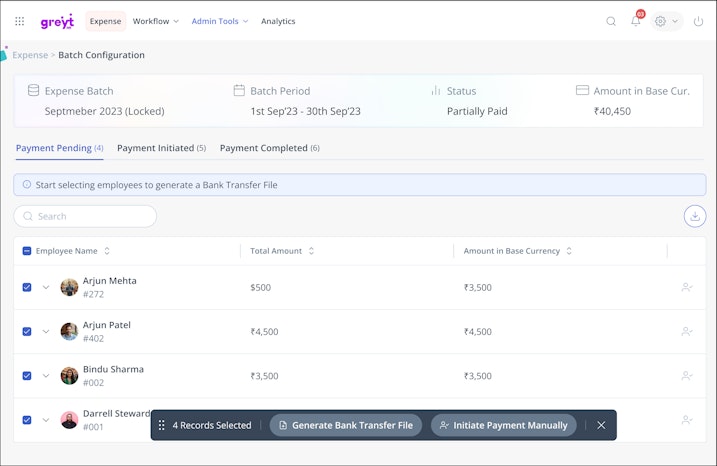
When you open a batch from the Batch Configuration page, three tabs are available: Payment Pending, Payment Initiated, and Payment Completed.

Generate the file from Payment Pending tab
Select one or more approved expense records from the Payment Pending tab. A floating banner appears with two options: Generate Bank Transfer File and Initiate Payment Manually.
Click Generate Bank Transfer File. A slider opens.
Select a Bank Template from the dropdown. The fields configured for that template appear in the slider.
Fill in the required details and click Generate. The records move to the Payment Initiated tab.

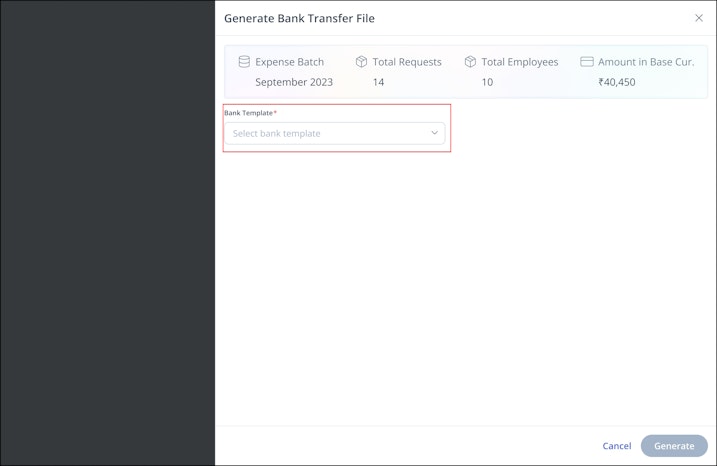
If any selected employees have invalid or missing bank account numbers, a note appears in the slide displaying "2 employees have invalid account numbers and can't be included in this transfer. They will be skipped for now."
Click Review Errors to view the list of affected employees and download it as a report.
Click Fix Error next to any employee to open their Employee Profile page and update the details.
You can proceed with generating the file without fixing the errors — those employees will be skipped.
Complete the payment from Payment Initiated tab
Once the bank transfer file is shared with the bank and the payment is done:
Open the Payment Initiated tab and select the records.
Click Mark as Paid and enter the payment details (such as payment date and method).
The records move to the Payment Completed tab.
Manual Initiation
If you select Initiate Payment Manually instead of generating a bank transfer file, the records move to the Payment Initiated tab under a separate Manual Initiation section. You can mark these as paid the same way and capture how the payment was made (for example, cheque or cash).
Mark expenses as paid
Once payments are initiated, you can mark records as paid from the Payment Initiated tab. Open the batch detail page to see the full list of expense requests included in the batch, with information such as the Expense batch, batch period (date range), total requests, status, and total amount. Each request shows details such as Employee Name, Expense Category, Submitted Date, Amount, Payment Date, and Remarks.
Select one or more expense records and click Mark as Paid. In the popup that appears, enter the following payment details:


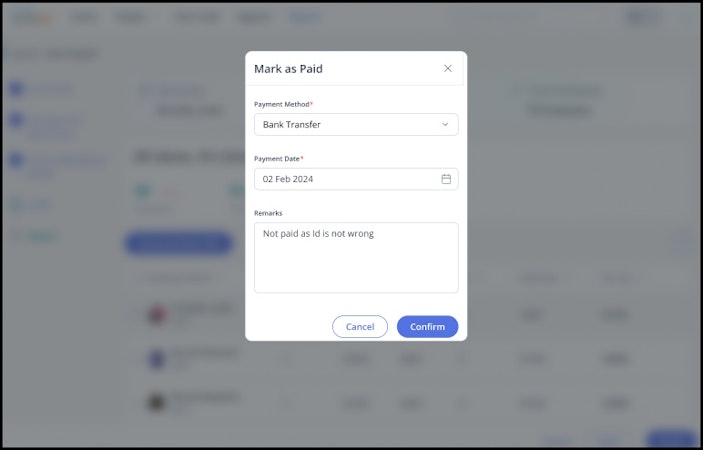
Payment Method – For example, Bank Transfer, UPI, or Cash.
Payment Date – When was the amount paid
Remarks – Optional, but you can add notes like “Paid with salary” or “Transferred via bank.”
After this information is saved, the selected requests will be moved to the Payment Completed tab and the payment details will become visible to the employees. This makes it easier to track which expense requests have been paid and which are still pending.
Undo payment status
If you’ve accidentally marked a request as paid, or if there’s a need to move it back for any reason, you can undo the payment update easily.
To do this:
Go to the Payment Completed tab inside the batch.
Click Move to Pending for the request you want to revert.
Enter the reason and any additional remarks explaining why it’s being moved.
Once done, that request will move back to the list of unpaid items. This ensures that you can correct mistakes or reprocess payments when needed.
Lock a batch
Once you start working on a batch, especially if you have begun reviewing or paying requests, you may want to prevent new expense requests from being reviewed for that batch period. This helps avoid changes to the batch when you're finalizing reports or payments.
To lock a batch:
On the Batch Configuration page, select the batch you want to lock and click the Lock option and confirm.


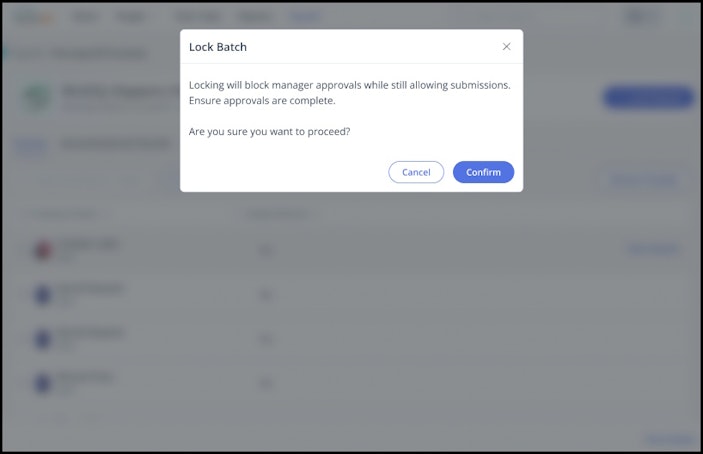
Note: You can also delete or unlock a batch by clicking delete/unlock options.
Once a batch is locked:
Managers will no longer be able to review any new expense requests submitted for that batch duration.
Employees can still submit new requests, but those requests will not be added to the locked batch.
You can unlock the batch later if you want to allow further changes or reviews.
Related article:
Configure expense policies in greytHR