Customize Job IDs Easily with greytHR Recruit
Updated in May - 2026 | Subscribe to watch greytHR how-to video
When managing recruitment at scale, clarity and consistency in identifying job openings are critical. Every job posted or processed in your recruitment pipeline needs a unique identifier—commonly known as a Job ID. You can think of it as a tracking code for your job post—used to refer to it across emails, reports, interviews, application forms, and internal discussions.
Keeping job IDs clear, consistent, and aligned with your internal processes is essential. By default, job IDs often follow a generic format, which might not match your organization's internal tracking or approval processes.
With greytHR Recruit’s Job ID Customization, you can easily create job IDs that reflect your organizational structure, such as:
Department-based prefixes (example, FIN-2025-001).
Location or business unit codes (example, BLR-MKTG-007).
Year-based numbering (example, 2025-HR-005).
Custom sequences aligned with internal requisition IDs.
Benefits of custom job IDs
Easily Trace Jobs: You can quickly recognize and reference the exact job you’re looking for.
Find Jobs Faster: Instantly search and filter jobs using familiar codes you already know.
Save Time on Manual Edits: Your job IDs align automatically with your internal numbering, eliminating the need for extra adjustments.
Better Collaboration: Teams across your organization can effortlessly find and collaborate on jobs thanks to familiar, consistent job IDs.
To customize job IDs in greytHR Recruit, you need to:
Enable the job ID customization
Configure/Customize the job ID
Enable job ID customization
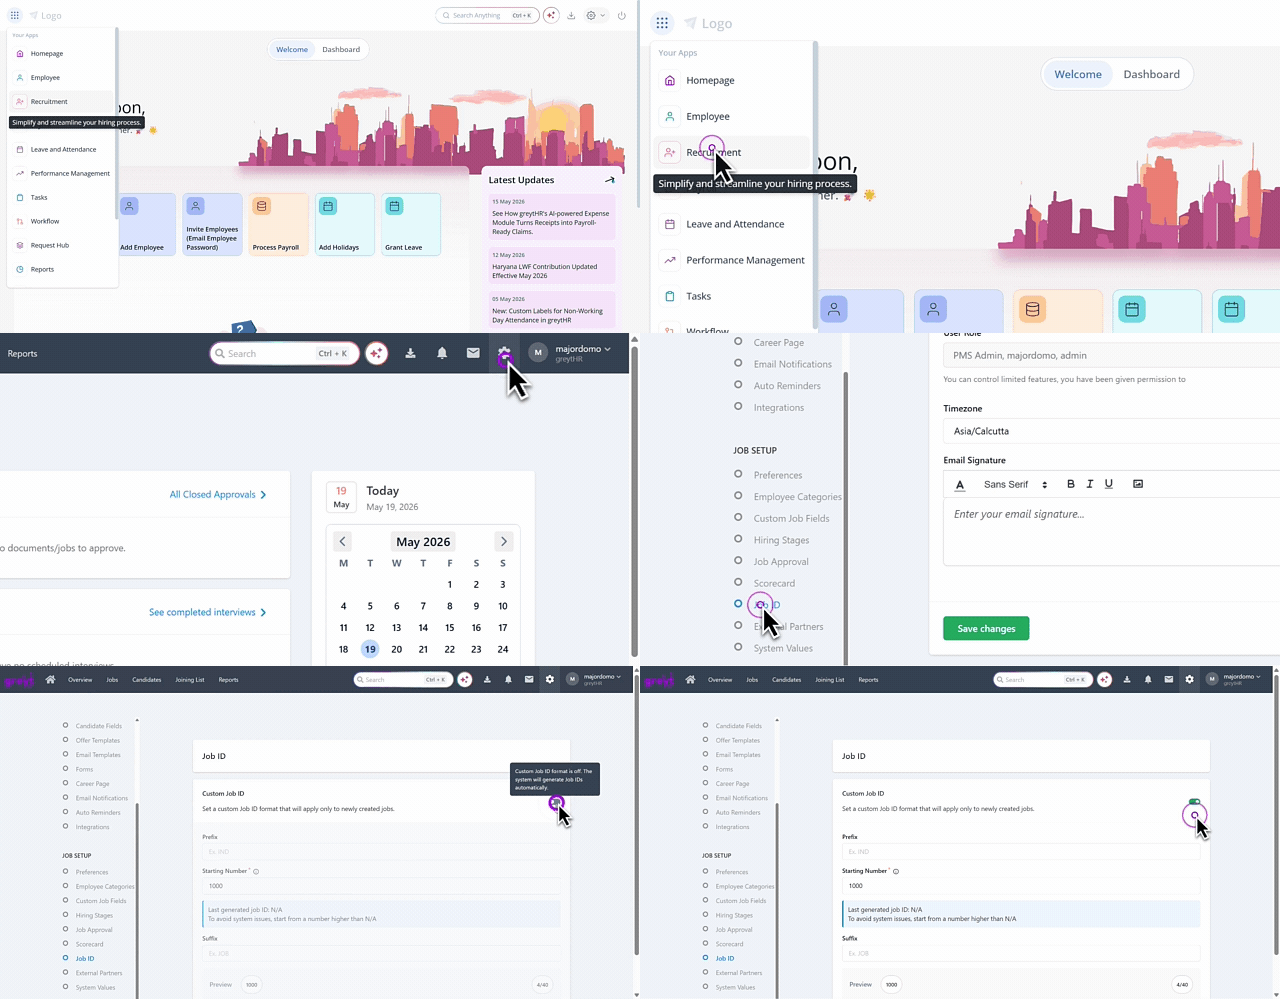
To enable the job ID customization, hover over the 9 dots on your greytHR Admin portal and select Recruitment > Settings > Job Setup > Job ID.
Enable the toggle button for the Custom Job ID option. When you enable this feature, your organization gets its own customized Job ID format. You can easily set up your preferred prefix, starting number, and suffix right away.
Configure/Customize the job ID
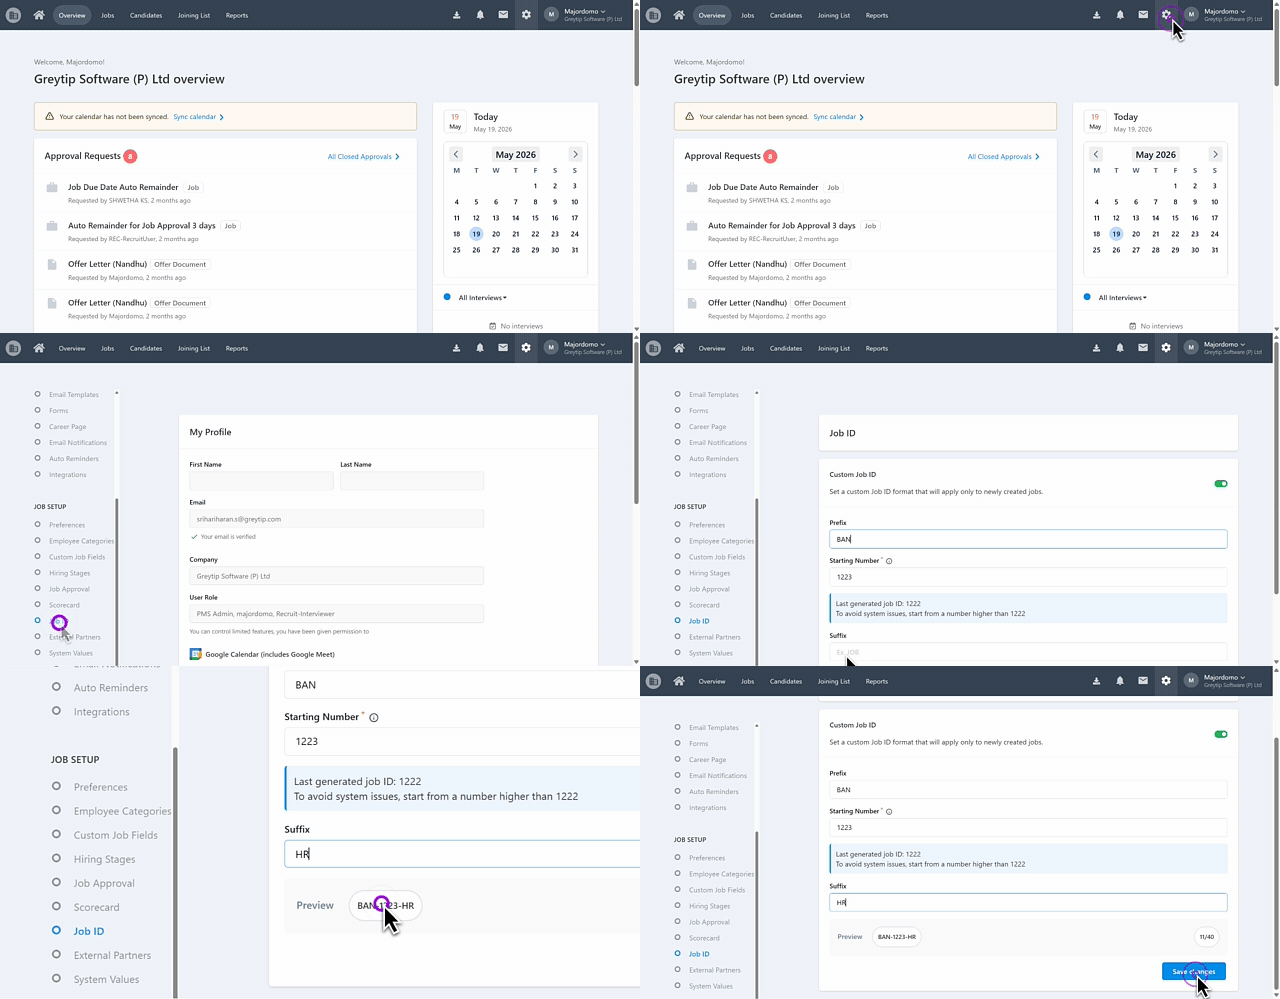
After enabling the Custom Job ID option, your next step is to configure or customize the job ID as per your preference.
In the Prefix box, enter the prefix relevant to the job. It should be an alphanumeric text field to enter the prefix (Example: “UAE”, “2025”). This is an optional field.
The Starting Number is a mandatory field, and it shows you the number based on the recently generated Job ID. While configuring this:
If there are already jobs created, you'll see the next available number automatically shown.
(For example: If you initially set the starting number as 1000, and you've created 10 jobs already, the starting number shown will be 1010. This means your next job will have 110 as the Job ID number.)If you haven't created any jobs yet, the starting number field will be mentioned as 1000, ready for you to enter your desired number.
You can also manually change the starting number at any point, but remember—your new starting number must always be greater than the last job ID number generated.
In the Suffix box, enter the suffix relevant to the job. It should be an alphanumeric text field to enter the suffix (Example: “JOB”, “Product”, “Sales”). This is an optional field.
Once done, you will be able to preview the custom Job ID created by you.
Click the Save Changes button to use this custom Job ID for the next job you post.
After you set up your custom Job ID format, all new jobs you post will automatically follow this format until you change it.


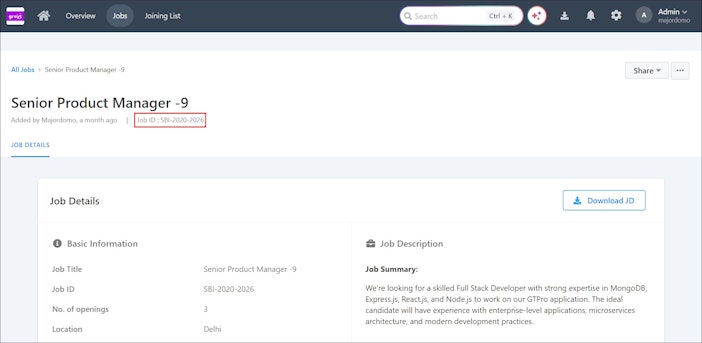
Note: Customized Job IDs will apply only to new jobs. Existing jobs that have already been posted will retain their original IDs and can't be updated.
Related articles: