Simplify Salary Revision Management with greytHR Workflow
Updated in January - 2026 | Subscribe to watch greytHR how-to video
Organisations need to revise employee salaries from time to time to stay fair, competitive, and motivating. Without a structured workflow, HR and payroll teams struggle to manage salary revisions efficiently. This often results in delays, errors, and limited visibility for employees, managers, and admins.
The new Salary Revision workflow in greytHR’s Request Hub brings visibility and control to managing salary changes in greytHR. Employees or managers can raise salary revision requests directly in the system, which then flow through configured reviewers before reaching payroll.
Set up salary revision workflow
To set up the Salary Revision Workflow policy, from your greytHR Admin portal, hover over the 9 dots and select Workflow > Setup > Workflow Levels.
General Settings
On the Workflow Levels page, click Add Workflow Levels.
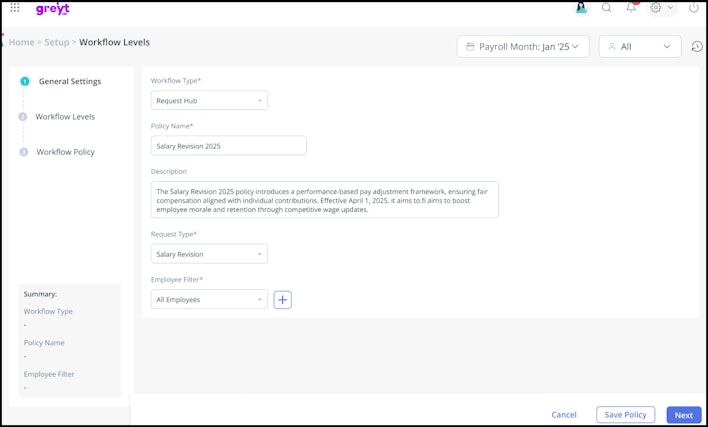
Select the Workflow Type as Request Hub.
Enter the Policy Name. You can also add a Policy Description if needed.
Select the Request Type as Salary Revision.
Select the required option from the Select Employee Filter dropdown list. The filter applies to the chosen employees only.
Click Save Policy to save the General Settings.
Click Next to move to the Workflow Levels settings.


Workflow Levels
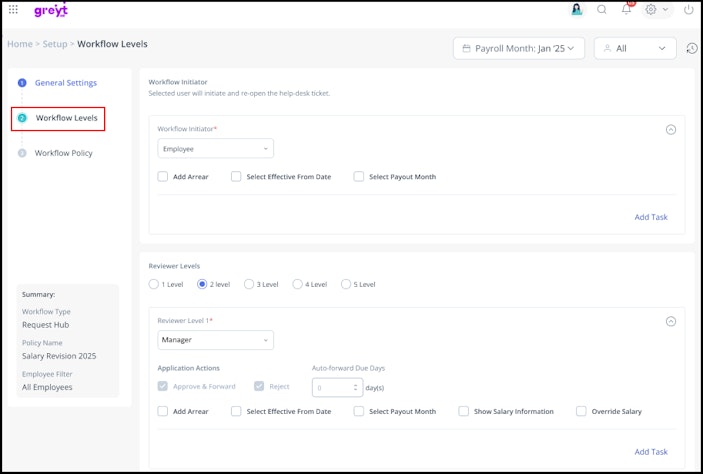
Under the Workflow Levels settings, select the Workflow Initiator as Admin, Employee, or Manager.
Select the available action if needed: Add Arrear, Select Effective From Date, and Select Payout Month.
Note: If the initiator is an admin or manager, you can also select the Show Salary Information option.Click Add Task to create a task list for the initiator.
On the Create Task window, provide the Task Name and Description.
You can also add attachments and make it mandatory for the reviewer to review.
Click Add Form to create a customized form for the reviewer.
Click Save to finalize the task creation.
Select the required number of reviewer levels (1 Level/2 Levels/3 Levels/4 Levels/5 Levels). You can also create a task list for the selected reviewer individually, if required.
Select Application Actions based on your requirements. Default available actions for reviewers (other than the final reviewer) include:
Approve & Forward: Approve the request and forward it to the next reviewer (available when multiple reviewers exist).
Reject: Reject the request (available for all reviewer levels).
Approve: Final reviewer can approve the request.
In the Auto Forward Due Days spinbox, set the number of days after which, if a reviewer does not take action, the request is automatically forwarded to the next reviewer. This is set to ‘Nil’ by default.
Select from the available actions if needed: Add Arrear, Select Effective From Date, Select Payout Month, Show Salary Information, and Override Salary.
Note: For the final reviewer, these actions are mandatory: Add Arrear, Select Effective From Date, and Select Payout Month, and hence are selected by default, and cannot be deselected.Click Save Policy to save the Workflow Levels.
Click Next to move to the Workflow Policy settings.


Workflow Policy
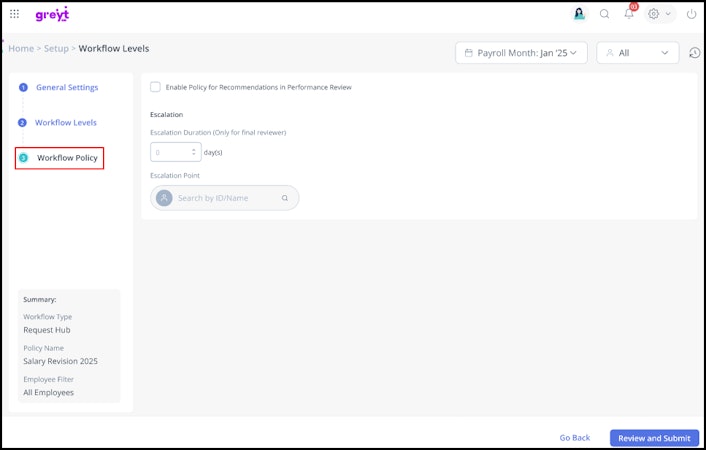
Under the Workflow Policy settings, select the Enable Policy for Recommendations in Performance Review checkbox to allow salary recommendations from Reviews to automatically trigger this workflow.
Note:If enabled, salary recommendations made during the review will directly trigger the workflow, skipping the initiator step and moving directly to the first reviewer.
This is applicable only to the employees who are a part of the configured Salary Revision Workflow policy.
Select the escalation duration for the final reviewer and mention the Escalation Point.
Before activating the workflow, click on the Summary section to review all the details of the workflow. Once done, click Review and Submit.


Activate the workflow request
After creating the Salary Revision Workflow request, you need to activate it. Go to the Workflow Levels page and click the Activate button on the policy card, and choose the required Effective From date.
Review salary revision workflow
For an admin to review the requests to revise employees’ salaries, from your greytHR Admin portal, hover over the 9 dots and select Workflow > Review > Request Hub.
Select the request with the Request Type as Salary Revision.
On the Review Request page, complete the assigned task, if any, fill out the form, Mark as Completed, and click Save Changes.
Note: You can view the previous actions under the Timeline section.In the Approval Details section, edit the Payout Details, choose the Effective From date, Payout Month, and edit the salary components as needed.
Once done, click Accept.
Finalize salary revision workflow by payroll admin
Once the reviewers complete their actions in the salary revision workflow, the payroll admin takes the final step to incorporate the changes made by the reviewers in the payroll.
To do this, from the greytHR Admin portal, hover over the 9 dots and select Payroll > Payroll Inputs > Consider Payroll Inputs > Salary Revision.
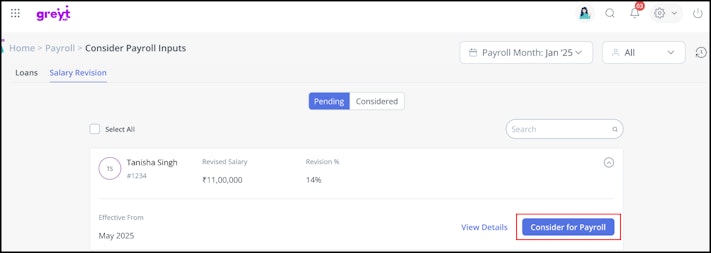
Under the Pending tab, you can select all or an individual employee as required.
Click View Details to check the details of an individual salary revision.
Edit the Payout Details and the salary components as needed.
Choose the effective date and Payout Month. You can also select the option to add arrears if needed.
Click Consider for Payroll and confirm it.


Initiate a salary revision request for an employee as an admin
As an admin, you can raise a request to revise an employee’s salary from the greytHR Admin portal.
Hover over the 9 dots and select Request Hub.
Select the Request Type as Salary Revision.
Add Remarks, set the Priority Level, and add a CC if you want to inform another employee about the request.
Complete the task, if any, fill out the form, Mark as completed, and save the changes.
Click the + Add Employees option to add the employees.
You can add employees by selecting all, choosing individual employees, or applying filters and click Save.
In the salary components table, click on the arrow next to Salary After Revision to view the expanded salary components table in detail.
Enter the revised percentage for each team member in the Revision % column or enter the revised amount or percentage in the editable salary component’s fields.
If an employee has a pending salary revision request, the system prevents duplicate requests during submission.
You can edit the Arrears, Effective From, and Payout Month tabs based on the configuration.
Click Update, and the revised amount or percentage will reflect for the editable components in payroll under the Salary After Revision section.
Note:
After submitting the request, it automatically moves to the Pending tab, where you can easily track its current status, view the timeline, and withdraw the request.
If the request is withdrawn, approved, or rejected, it moves to the Closed tab.
Initiate salary revision request for employees in bulk as an admin
As an admin, you can add employees in bulk from the greytHR Admin portal to raise salary revision requests efficiently.
Hover over the 9 dots and select Request Hub.
Select the Request Type as Salary Revision.
Add Remarks, set the Priority Level, and add a CC if you want to inform another employee about the request.
Complete the task, if any, fill out the form, Mark as completed, and save the changes.
To add the employees in bulk, click on the Download sample file option, and an Excel file is downloaded to your system.
Open the Excel file, add the required information, and save it.
Note:The employee number has to be in text format. To ensure this, for the numerical employee numbers, add an apostrophe (‘) before each employee number to avoid getting any errors while uploading the Excel file.
You must enter the amount for each salary component in numbers, not as a percentage.
Only the salary components that are editable in the salary configuration are included in the Excel file for editing.
Each column header includes a note on the expected format, which you can refer to for better clarity.
Once done, click on the Import option and upload the Excel file from your system.
The employees’ salary revision details are added to the table after import. Once imported, the details cannot be edited. To make changes, click Reset, update the Excel file, and upload it again.
Clicking on the Reset option will remove all the employees from the table.
Click Submit.
Related articles: