Configure Expense Policies Easily in greytHR for HR Admins
Updated in November - 2025 | Subscribe to watch greytHR how-to video
Expense policies help organizations define rules, limits, and workflows for processing employee expense requests.
In the greytHR Admin portal, you can create expense policies based on departments, locations, or specific employee groups to suit your organization’s needs.
With expense policy configuration, you can:
Set reviewer workflows and entitlements based on predefined conditions.
Control limits, frequency, and approval logic for different expense categories and types.
Assign policies to selected employees or groups using employee filters.
The User Roles page in the greytHR Admin portal allows you to configure the access rights to create expense policies based on departments, locations, or specific employee groups
To view the User Roles page, click the Settings icon > System Settings > User Administration > User > User Roles.
Select the admin user role card and click the Edit icon.
From the Category dropdown list, select Expense Management. The table displays all the related features.
Enable the Read Access and Write Access checkboxes for features such as Expense Management, Expense Review - View Policy, Expense Review - View Rule, Policy Admin Settings Expense, Policy Employee Expense, and Rule Evaluation Expense.
Click Save.
Once the access rights is enabled, on the Policy Configuration page, you can:
Create a new expense policy
Configure rules for the expense policy
Assign Employees and
Review Policy
Create a new expense policy
As an admin to create a new expense policy, from the greytHR Admin portal, hover over the 9 dots and select Expense > Admin Tools > Settings > Policies.



On the Policies page click Create New Policy.
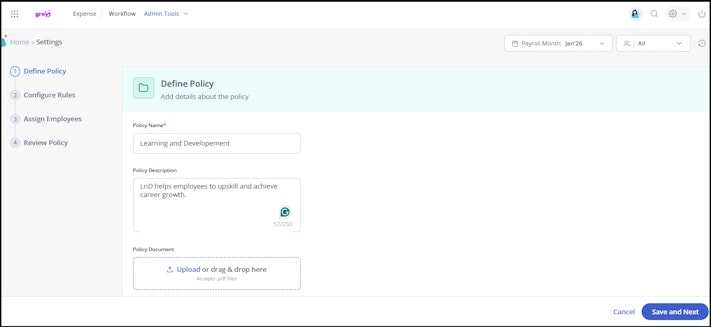
Enter the Policy Name and Policy Description.
Under Upload Policy, upload the company expense document. This document is visible only to admins in the workflow which can be used as reference while reviewing the expense request or applying.
Click Save and Next.


Configure rules for the expense policy
For each policy, you can add multiple rules based on conditions
Click Add Rule and set the If Conditions:Expense Category, Expense Type, Amount, Department, Location, etc.
Define the Then Statements:Reviewer Configuration, Entitlements (limits per day/month/year), Claim Frequency and Count, Auto-approval or Auto-rejection, Reminders and escalation settings, Backdated claim rules, Default fields.


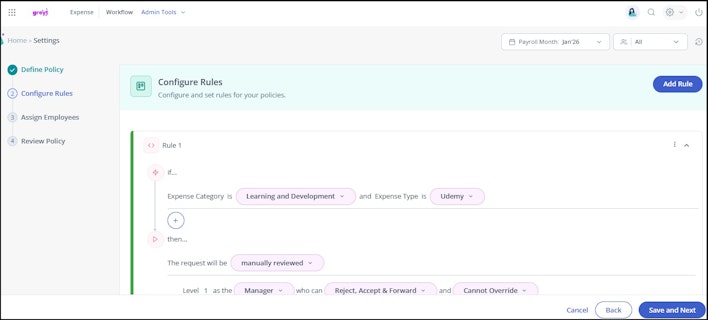
Configure rule section - IF condition
In the IF condition of each rule, the Expense Category and Expense Type are mandatory. These two fields are essential for defining the conditions under which the rule will apply. Both Expense Category and Expense Type must use the "IS" operator, which means they will match the exact category or type specified.
Expense Category: This field is used to select from the list of all active expense categories defined in the system. Once selected, the system will apply the rule only for the selected expense category.
Example: If you select the Expense Category as Learning and Development, the rule will apply only to claims made under Learning and Development expenses.

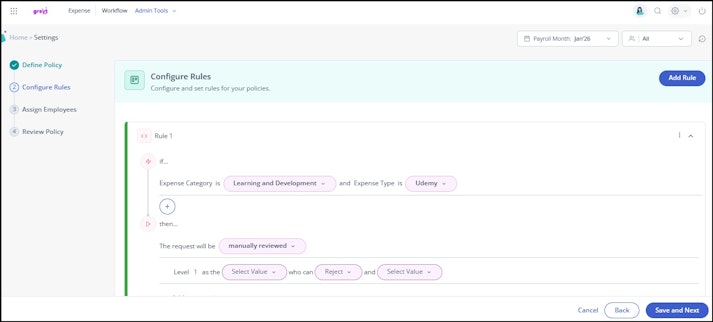
Expense Type: Similarly, this field is used to define the type of expense being claimed, and only active expense types will be available for selection.
Example: If you select Expense Type as Courses, the rule will apply only when employees claim for course-related expenses.

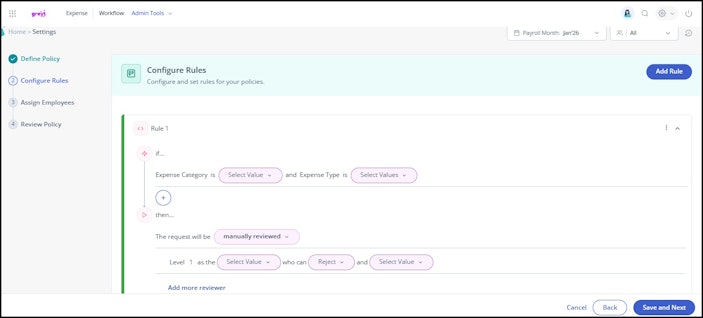
For all rules, after configuring these two fields, you can add additional conditions using the AND operator. This allows you to combine multiple conditions, such as Total Amount, Department, Location, etc., based on which the rule will be executed.
Configure rule section – THEN condition
The THEN section of a rule defines the actions or consequences that follow once the IF conditions are met. This controls how the claim will be processed, who will review it, what limits apply, and more.
Below are the key actions that can be defined in the THEN section, with examples for each:
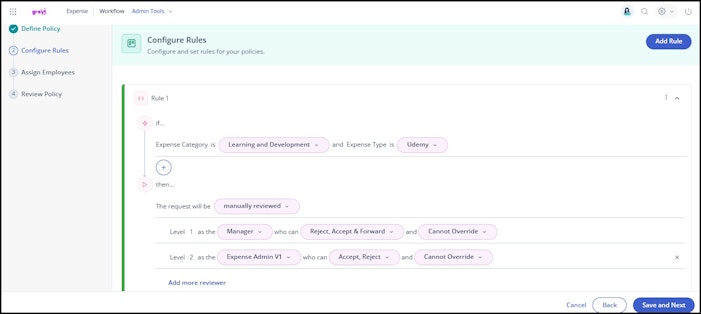
Reviewers Configuration
Defines who will review the expense requests once the IF conditions are met.
Example: If the claim is for Learning and Development > Courses above ₹20,000, it can be set to first go to the Manager and then to the L&D Head for approval.


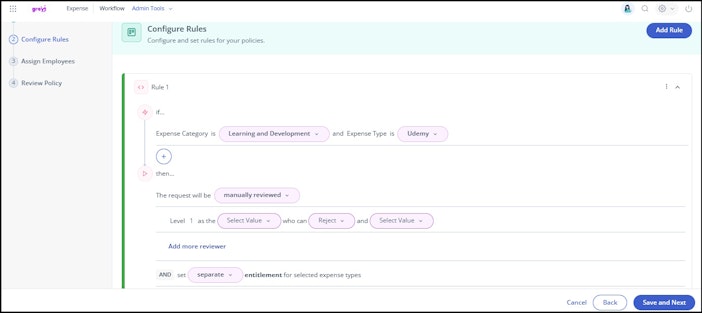
Entitlement for selected Expense Type
Specifies the maximum amount allowed for the selected expense type.
Example: For Courses, you may set a limit of ₹25,000 per course, per year. Any claim above this will be rejected or flagged.

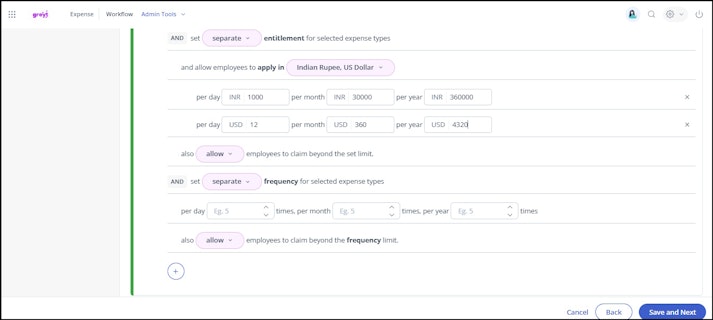
Currency type selection for expense claims
Allows you to configure the currency types in which employees can submit expense claims. The selected currencies will be visible to employees while submitting their expense requests.
Example: If you enable INR and USD, employees can choose either or both currencies when submitting the expense requests.


Entitlement for selected Expense Category
Sets the maximum limit for the entire category.
Example: For Learning and Development, set a total limit of ₹50,000 per year per employee. This covers courses, workshops, and certifications combined.Limits
Restricts the claim amount irrespective of entitlement.
Example: Even if the entitlement for Courses is ₹25,000, you can set a limit of ₹15,000 for employees with less than one year of service.
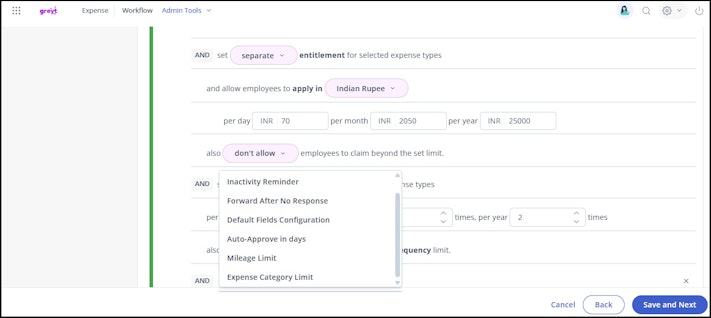
Claim Frequency and Count
Controls how often claims can be submitted for certain expenses.
Example: Employees can claim for Courses only twice per financial year.
Auto-Approval or Auto-Rejection
Automates claim approval/rejection based on conditions.
Example: Auto-approve course fee claims under ₹10,000 if they are from the approved vendor list; auto-reject if the course is from an unapproved provider.Reminders and Escalation Settings
Sends reminders or escalates pending claims.
Example: If the L&D Head doesn’t act within 5 days, send a reminder; if no action is taken within 10 days, escalate to the HR Admin.Backdated Claim Rules
Restricts submission of claims older than a certain period.
Example: Allow backdated course claims only up to 60 days from the start date of the course.Default Fields
Pre-fills common fields to speed up claim submission.
Example: Automatically set the Expense Category to Learning and Development, Expense Type to Courses, and Tax Percentage to 18% for all domestic course claims.
Note:
It is essential to ensure that each IF condition and corresponding THEN statement is filled out correctly. The system will throw an error if any required field is left empty or if conflicting conditions are present.
You can create multiple rules within a single policy to handle different business scenarios, such as department-specific limits or location-based entitlements.
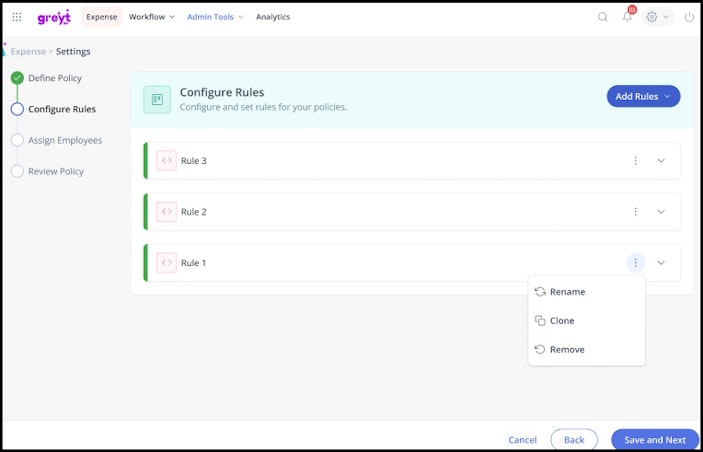
Once the rules are configured, click Save and Next to save the configuration. You can Rename, Clone, or Remove the configured rule by clicking on the 3 dots next to each rules. Once done, click Save and Next.


Assign the Policy to Employees
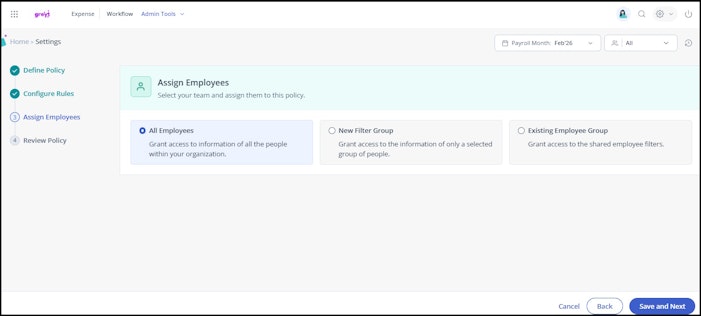
Admin has two options to assign a policy:
All Employees:
By selecting this option, the policy will be applied to all employees in the organization.
After selecting "All Employees", the admin can click on Finish and a pop-up will appear to activate the policy.
Group of Employees:
Admin can create a New Filter Group to assign the policy to a specific set of employees.
To create a filter group, the admin can select various employee attributes (e.g., department, location, or designation) to target a specific group.
After creating the filter, click Save and Next.
Click Next to activate the policy.


Activate the Policy
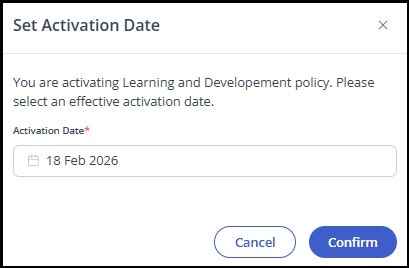
Set an Effective Date and click Activate.


Note: Once active, the policy will apply as per the defined rules. You can configure one employee in one policy for an expense category to ensure consistency in policy application.
Manage and review existing policies
You can manage and review the existing policies from the policy listing page.
All the policies are visible in Draft, Active, or Closed status with details such as Policy Name, Expense Type, Employees Assigned, and Duration.
You can Edit, Activate, or Delete the polices under the Draft tab.
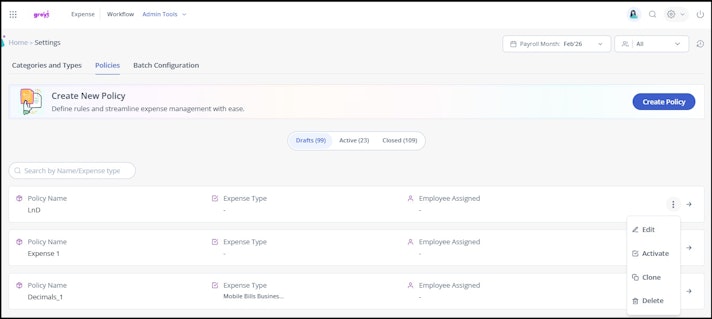
You can Deactivate or Clone the policies under the Active Tab.


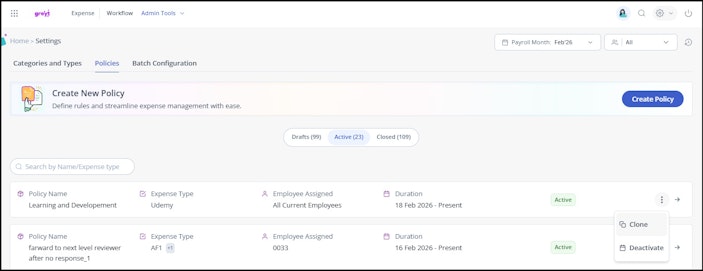
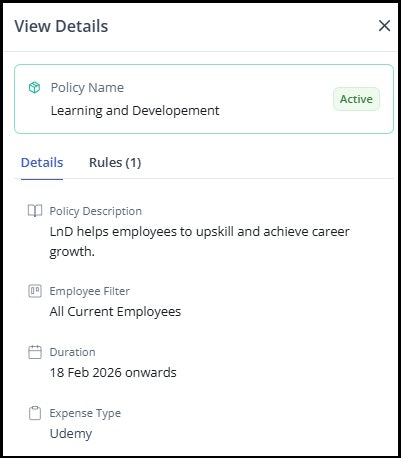
Click the Arrow to view detailed rule configurations for any policy.


Related Articles:
Review and monitor employee expense requests