Categorize Employee Expenses Efficiently with greytHR
Updated in November - 2025 | Subscribe to watch greytHR how-to video
As an admin, you may often receive expense requests from employees for business-related costs like travel or meals, where the details are submitted under vague or incorrect categories. This lack of clarity can create confusion during verification and make it harder to track and manage expenses effectively.
To solve this, greytHR allows you to create structured expense categories so that employees can submit their expense or reimbursement details under clearly defined categories. This keeps submissions clean, easy to manage, and aligned with your company’s reimbursement policies, saving time and reducing errors.
To enable access to create structured expense categories, from the greytHR Admin portal, go to Settings > User Administration > Users > User Roles.
Select the admin user role card and click the Edit icon.
From the Category dropdown list, select Expense Management. The table displays all the related features.
Enable the Read Access and Write Access checkboxes for features such as Expense Management, and Expense Categories and Types.
Click Save.
Create an expense category
To create an expense category for employees’ expenses, hover over the 9 dots, click Expense > Admin Tools > Settings > Categories and Types.
Enter the category name, code, and icon, and save the details. Once saved, the expense category is created, and the status is enabled by default.
Note: The category name and icon are mandatory fields.
If you want to create more expense categories, click the Create option and select Expense Category.


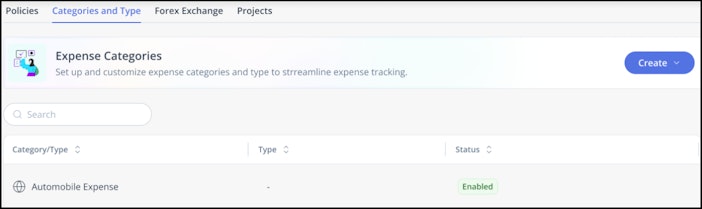
After creating the expense category, you have the option to edit or disable it as per your requirement.
Edit an expense category
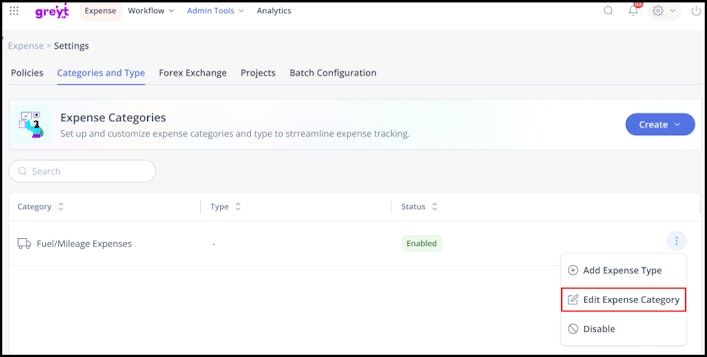
To edit an expense category, click on the three vertical dots (⋮) and select Edit Expense Category. Mention the necessary changes and save them.


Disable an expense category
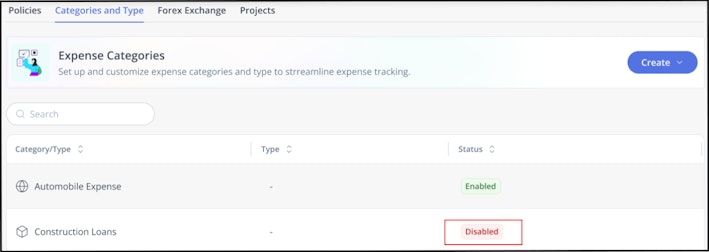
To disable an expense category, click on the three vertical dots (⋮) and select Disable. The status of the expense category will be changed to Disabled.
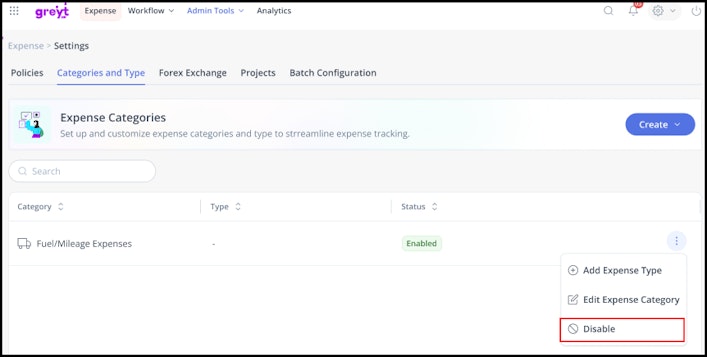
Note: Once an expense category is disabled, you cannot enable it again.


Create an expense type
Once you’ve created an expense category, the next step is to define expense types within it. These types specify what kind of expenses employees can request for, like cab fare, meals, or mileage.
This helps in organizing expense requests better and applying specific rules to each type.
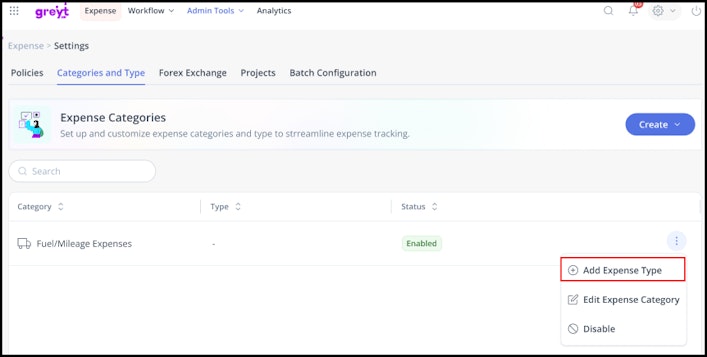
You can create an expense type by clicking on the three vertical dots (⋮) and selecting Add Expense Type.
Alternatively, you can select the Create option > Expense Type.
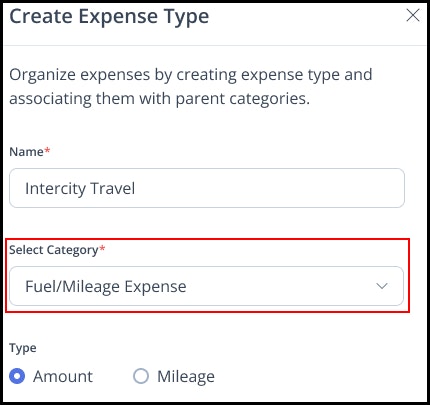
In the Expense Type creation page, fill in the details such as name, category, and type.
Note:
If you are creating the expense type within an expense category, then the category for the expense type will be selected automatically.
The employee can apply for an expense type only when the expense type is created. As an admin, you can configure the effective date to past/present/future.
If you select the type as Amount 💰, then the employees need to mention the actual amount. For example, the internet bill, or cab fares for official trips.
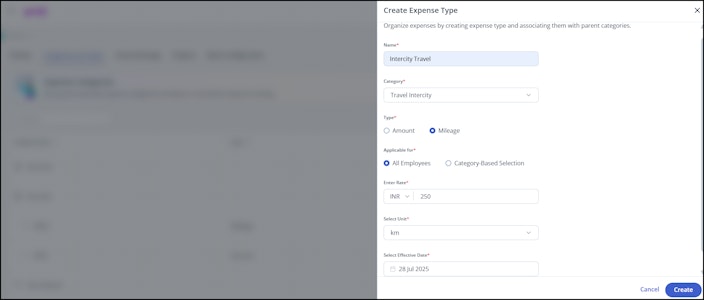
If you select the type as Mileage 🛣️, you need to configure a mileage rate. Employees can then enter the distance traveled (in kilometers or miles) and mention the amount based on the predefined rate.


Additionally, you need to select the category for which you can define the rule for mileage.
If you select All Employees, you'll need to enter the rate, unit, and effective date—this single rate will apply to all employees across the organization.


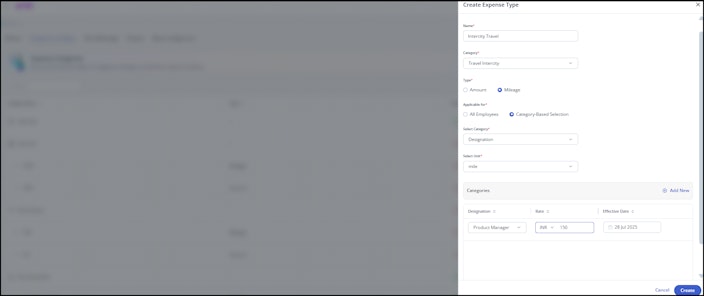
If you choose Category Based Selection, you’ll need to select the category and unit, define the rate for each category and the effective date accordingly.
Note: All the fields are mandatory.


<ArticleFeedback heading="Did we answer your question?" />
Related article: