Efficiently Process Employee Final Settlement in greytHR
Updated in April - 2026 | Subscribe to watch greytHR how-to video
Processing full and final settlement is a legal requirement that must be performed when an employee is leaving an organization, either voluntarily or involuntarily. It involves calculating and settling all outstanding dues, such as salaries, bonuses, incentives, and benefits, and ensuring that any outstanding loans or advances are fully repaid. Additionally, deductions for any outstanding taxes, fines, or penalties must be made.
An efficient and timely processed full and final settlement ensures a positive relationship with employees leaving the organization.
The Final Settlement page in the greytHR Admin portal enables you to process an employee's full and final settlement. You must process an employee's full and final settlement when the employee exits your organization. This page also displays a list of settlements you have processed for a month. You can also lock an employee's settlement details to ensure no further changes occur to these calculations.
To view the Final Settlement page, from the greytHR Admin portal, hover over the 9 dots and go to to Payroll > Payroll Inputs > Final Settlement.
Watch the video to know more about greytHR's full and final settlement feature:
You can perform the following actions on the Final Settlement page:
Process full and final settlement of an employee.
Lock/unlock the final settlement details of an employee.
Process full and final settlement of an employee
To process the full and final settlement of an employee, from the greytHR Admin portal, hover over the 9 dots and go to to Payroll > Payroll Inputs > Final Settlement.


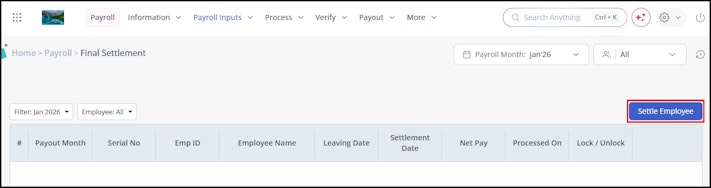
On the Final Settlement page, navigate to the Settle Employee button. The Settlement page opens.
Note: Alternatively, you can navigate to Actions > Payroll > Monthly Actions > Settle Resigned Employee. The Settlement page opens.Under Step 1: Employee, select the Separated Employee radio button.
Alternatively, you can select the Search Employee radio button to search for a particular employee.
From the Employees to be settled dropdown list, search for the employee whose settlement process you want to complete.
Click Next.
Note: If the selected employee's POI workflow is pending then you will view an error message POI Workflow is open for employee name/number, please proceed to complete the workflow and then do the settlement. You must take action on the POI Overview page and then complete the final settlement to avoid any errors during tax computation.
Under Step 2: Resignation Details, from the Resignation Submitted On dropdown calendar, select the date of the employee's resignation.
From the Leaving Date dropdown calendar, select the employee's last day.
From the Leaving Reason dropdown list, select the employee's reason for leaving the organization.
From the Settlement Date dropdown calendar, select the settlement date of the employee.
Click Next.
Under Step 3: Notice Pay, select the Notice Required checkbox to activate the notice period for the employee.
In the Notice Period text box, enter the number of days to be served as the notice period.
Based on the Notice Period you have entered system calculates the Shortfall in Notice days automatically.
Click Next.
Under Step 4: Work Days, read and understand the notifications displayed.
Under the Days Worked column, enter the number of days the employee has worked.
Click Next.
Under Step 5: Leave Encashment, enter the employee's leave details.
Click Next.
Under Step 6: Remarks, read and understand the note. To make a different choice regarding the IT declaration, click click here.
In the Remarks text box, enter the remarks, if any.
Click Finish to complete the full and final settlement of the employees. A success message appears.
Lock/unlock final settlement details of an employee
To lock/unlock the final settlement details of an employee, from the greytHR Admin portal, hover over the 9 dots and go to to Payroll > Payroll Inputs > Final Settlement.
On the Final Settlement page, using the Filter and Employee dropdown lists, customize the list of employees as per your requirements.
Click the Lock/Unlock icon under the Lock / Unlock column for the required employee. A success message appears.


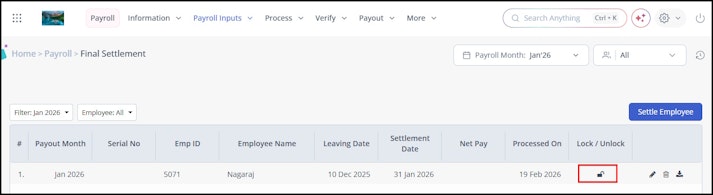
Note: You can also use the Edit, Delete, and Download icons available next to the Lock / Unlock column for editing, deleting, and downloading the final settlement details of an employee.
Related articles: