Add or Edit Event Notifications in greytHR Admin Portal
Updated in July- 2025 | Subscribe to watch greytHR how-to video
The Event Notification page in the greytHR Admin portal displays a list of event notifications in the application. You can create a new notification on the page. The page allows you to trigger notifications automatically when the event occurs.
You can send notifications for events such as Add Employee, Asset Allocation, Attendance Override, Attendance Regularization Apply, Document Upload, Create Payroll, and Permission Requests. You can also filter the notifications as per your requirements.
To view the Event Notification page, go to Settings > System Settings > Miscellaneous > Event Notification.
Add/Edit event notifications
To add/edit event notifications, from the greytHR Admin portal, navigate to Settings > System Settings > Miscellaneous > Event Notification.
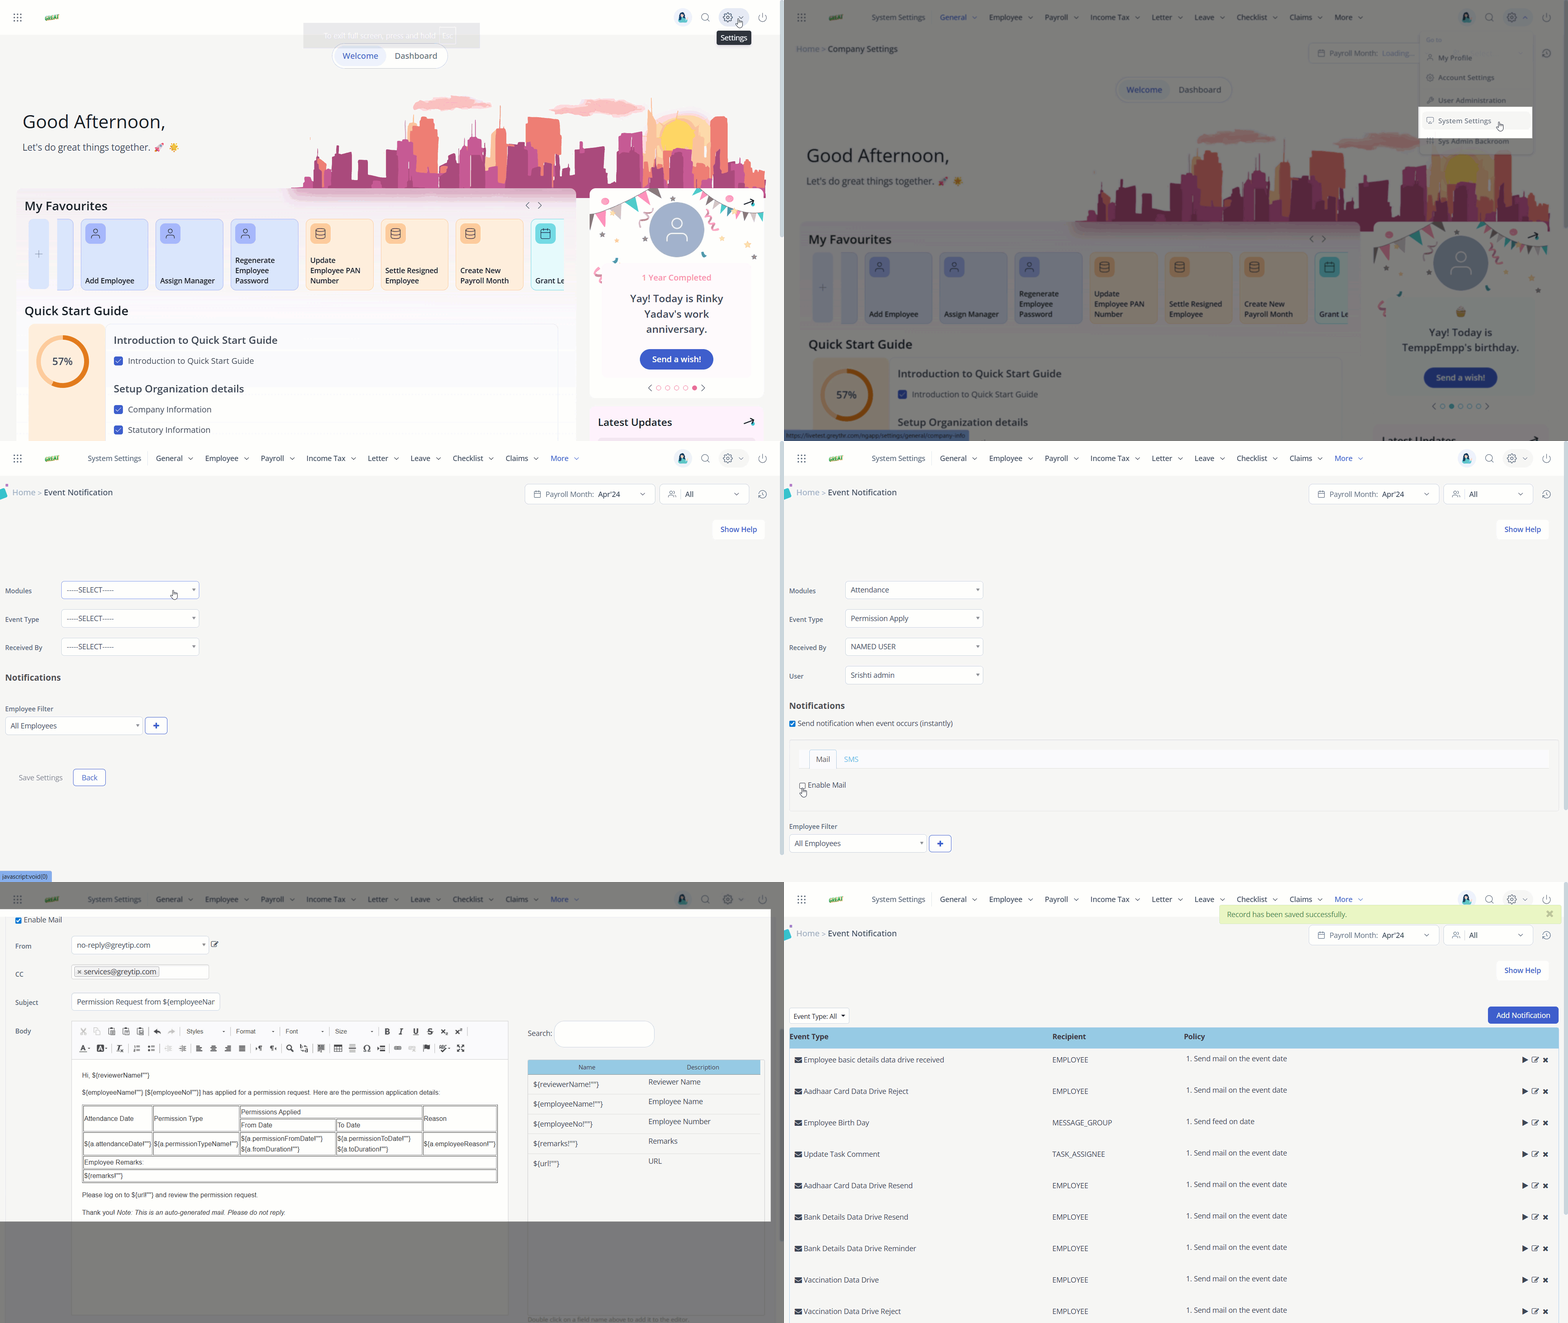
On the Event Notification page, click Add Notification.
From the Modules dropdown list, select the relevant module. Modules such as Payroll, Core HR, Attendance, Leave are available. For example, select the Attendance module.
From the Event Type dropdown, choose the appropriate event for which the notification should be triggered. Example for event types under the Attendance module include:
Permission Apply
Permission Apply on Behalf
Permission Reject
Permission Withdraw
Permission Auto-forward and more
From the Received By dropdown, select the recipient(s) of the notification. Options include:
Employee
Manager
Manager's Manager
Named User
Note: You can either select one employee by name or number, or choose a group of employees for whom the configured template for an event type would be applicable.
In the Notifications section, select the Send notification when event occurs (instantly) checkbox to trigger the notification automatically.
Select any one of the Mail, Mobile Notification, or SMS tabs and fill in the details to send the notification via mail, mobile, or SMS as per your requirements.
Note: Communication messages sent via SMS and mobile notifications are currently disabled for Permission events under Attendance module.To send via mail choose the Mail tab and enter the following:
From: Select the sender from the dropdown.
CC: Enter static or dynamic recipients to be copied.
Subject: Enter the subject of the email.
Body: Compose the email body using the available placeholders. If needed, you can copy content from the default templates provided for specific events and receivers in certain modules, or configure new templates as required.
Note: The Placeholder Panel on the right helps you insert dynamic fields such as ${emp.name}, ${emp.joinDate}, ${reviewer.name}, etc. This panel is searchable and supports all supported variables.
From the Employee Filter dropdown, select the target group for whom this notification applies. You can click + Add New Filter to create a new custom filter.
Click Save.
Note:
You can edit/delete the existing event notifications by clicking the Edit/Delete icon available on each event type row.
Only one unique template is allowed per event and receiver type. Multiple templates for the same event and receiver type will not be supported.
You can also enable/disable the existing event notifications by clicking the ▶/॥ icons available on each event type row.
Related Articles:
Send email/messages to employees in bulk