Review and Manage Employee Expense Requests in greytHR
Updated in March-2026 | Subscribe to watch greytHR how-to video
Reviewing expense requests helps ensure claims comply with company policies, include valid documents, and stay within approved budgets. As a manager, you can easily track, review, and take action on pending or approved expense requests from the greytHR ESS portal.
Review employee expenses
To review an expense request, log in to your greytHR ESS portal and select To Do > Review > Expense.
The Review section on the Workflow page has two tabs:
Active: Displays the list of all the expense requests submitted by the employee that you need to review.
This includes the Employee Name, Expense Type, No. of Expense Items, Total Amount, and the Submitted On date.
You can filter the data as per the expense request and submission date using the top-right icon.


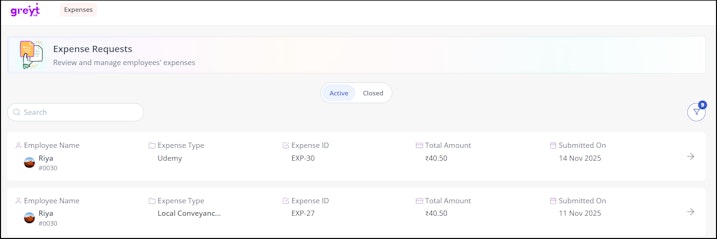
Closed: Lists the requests that have already been reviewed and processed.
From the Active tab, click on the → option to view the details of the expense request.
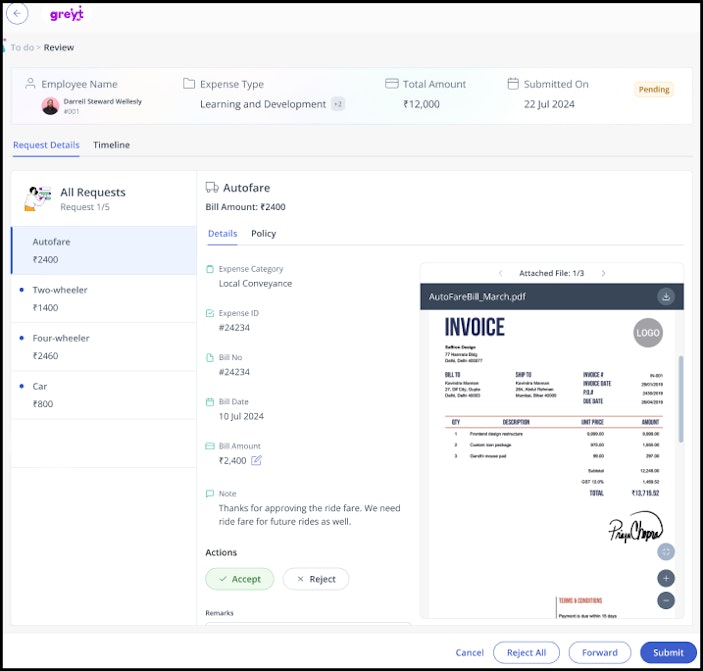
On top of the Review page, you can view the Employee Name, Expense Type, Total Amount, submission date, and status.
Under the Request Details tab, on the left, you can view the individual expense items.
In the Details section, you can see the detailed information about the expense request, such as the Expense Category, Expense ID, Bill No., any notes from the employee, and attachments shared by the employee. The PDF Viewer helps you to zoom in and out of the attachments, preview the attachment without downloading it, view multiple attachments, and also download the attachments.
You will also have the Actions options (Accept/Reject) as per the policy configurations and Remarks sections.
Under the Timeline tab, you can view the actions taken by all the other reviewers and the status with respect to each expense item.
Once reviewed, click the required action option (Accept/Reject/Forward) as per the policy configuration for each expense item and click Submit.
Note: If you reject the expense item, it is mandatory to add the remarks.


Info: If you need to override the bill amount or price per kilometer, click on the Edit icon next to the Price per Mile/Price per Kilometer option. Enter the Override Amount/Override Price per Kilometer, remarks for overriding, and click Save. The updated Overridden Amount/Updated Bill Amount would appear accordingly.

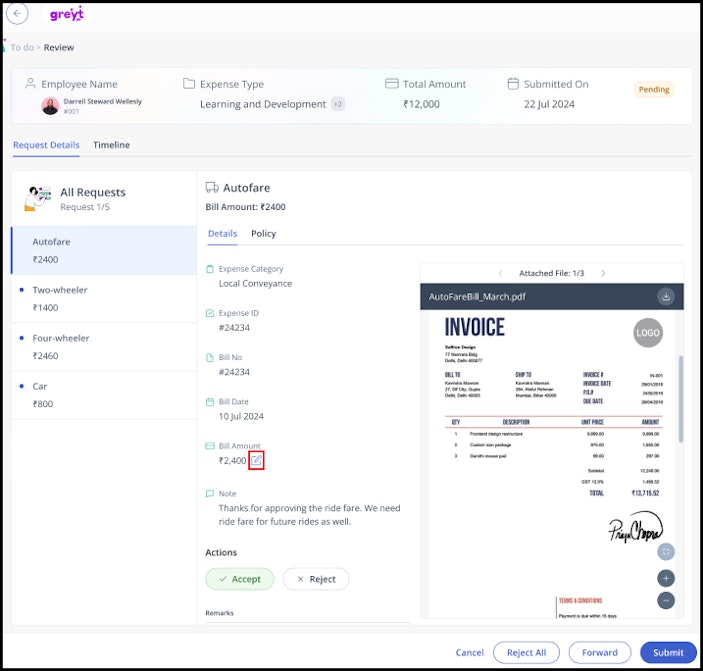
Info: As a manager, you can override the expense amount only in the currency in which the employee submitted the claim. For example, if the employee applied for the expense request in USD, the override can be done only in USD.
Other related links: